To build our bot we will need the following materials. In some cases we will be able to sustitute some of them but that wil depend on our budget and level of exepertise in order to handle those modifications.
Electronics
Here, you have the schematic to build the electronic parts of your robot. You can see the connections betwenn ultrasonic sensor, driver, arduino nano, motors and batteries. You can add a switch in the red cable of the batteries.

- Arduino Nano
- Motor Driver - TB6612FNG
- Ultrasonic Sensor - HC-SR04
- DC Motors (Yellow motor) (x2) + Wheels (x2)
- 4 slots battery case
- AA Batteries (x4)
- Switch
- Jumpers (wires)
- Protoboard
- Infrared Sensor - TCRT5000 (in development)
Mechanics
You will need two wheels that usually come in the same package of your yellow motors. Also, you will need a ball caster. It will work as a support for the front part. Then, all the other parts of the chasis will need to be 3d printed.
- Wheels (x2) (normally when buying the yellow motors it includes wheels)
- Caster
- Chasis 3D printed with PLA+
3D printed parts
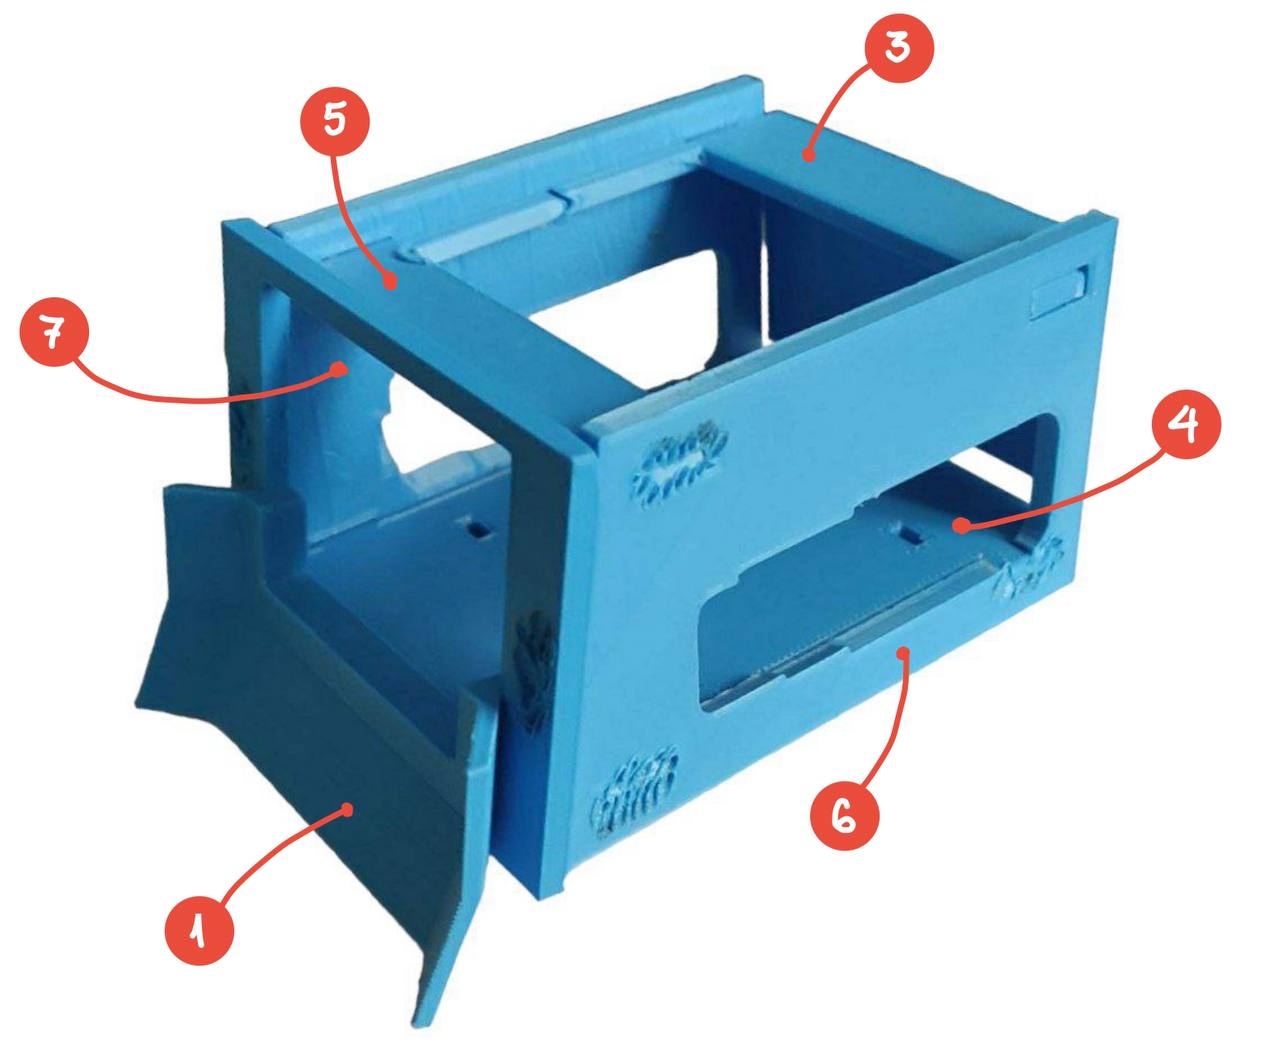
In the next image, you can see the assembled chasis. Both part 1 and part 2 are variations of the front part so you are free to use whatever you want. Here, we use part #1 (front-pale) since I like it over the ramp design. I joined parts 1, 3, 4, 5, 6 and 7 melting the unions with my soldering iron. I just let part 3. sumo-back-ceiling not melted since you need to be able to take it apart to insert batteries and cables easily.
- front-pale
- front-ramp
- sumo-back-ceiling
- sumo-base
- sumo-front-ceiling
- sumo-side-left
- sumo-side-right
- ultrasonic-support
Motors and ultrasound sensor are pretty much standard in size. When you will find issues is in the switch size. If you now a bit of OpenSCAD you can actually download the following file which is the design file of part 3. sumo-back-ceiling. Then, you will be able to modify the width and heigth given the switch you have bought.
TODOs:
- Explain the building process step by step.
- Make a recommendations part.